Electrical
Difficulty
Time Spent
3 Days
Approx Cost
$300 - $1800
Main specs for American yurt companies (organized alphabetically). Updated December 2019. Pacific Yurts declined to provide information for this website.
Yurt Company Acronym Key
- BR = Blue Ridge Yurts
- CY = Colorado Yurt
- GL = Great Lakes Yurt Co
- LI = Living Intent Yurt Co
- NS = Nomad Shelter
- RO = Rainier Outdoor
- SD = Shelter Designs
- YA = Yurts of America
Company Contact
| Company | Website | Phone Number | |
|---|---|---|---|
| BRBlue Ridge Yurts | blueridgeyurts.com | [email protected] | (540) 745-7458 |
| CYColorado Yurt | coloradoyurt.com | [email protected] | (800) 288-3190 |
| GLGreat Lakes Yurt Co | greatlakesyurtco.com | [email protected] | (269) 808-3664 |
| LILiving Intent Yurt Co | livingintentyurts.com | [email protected] | (207) 350-9457 |
| NSNomad Shelter | nomadshelter.com | [email protected] | (907) 235-0132 |
| RORainier Outdoor | rainieroutdoor.com | [email protected] | (866) 483-6795 |
| SDShelter Designs | shelterdesigns.net | [email protected] | (406) 721-9878 |
| YAYurts of America | yurtsofamerica.com | [email protected] | (317) 377-9878 |
Company Details
| Company | Location | Year First Yurt Sold | Tour Available? |
|---|---|---|---|
| BRBlue Ridge Yurts | Floyd, VA | 2004 | |
| CYColorado Yurt | Montrose, CO | 1980 | |
| GLGreat Lakes Yurt Co | Grass Lake, MI | 2017 | — |
| LILiving Intent Yurt Co | Grass Valley, CA | 2015 | |
| NSNomad Shelter | Homer, AK | 1987 | |
| RORainier Outdoor | Tukwila, WA | 2004 | |
| SDShelter Designs | Missoula, MT | 2005 | |
| YAYurts of America | Indianapolis, IN | 1986 | — |
Yurt Info
| Company | Available Sizes | Max Snow Load* | Base Cost of 30' | Base Cost of 16' |
|---|---|---|---|---|
| BRBlue Ridge Yurts | 16', 20', 24', 30' | 60 psf | 60 psf | $13,047 | $7,299 |
| CYColorado Yurt | 16', 20', 24', 27', 30' | 15 psf | 95 psf† | $12,240 | $7,090 |
| GLGreat Lakes Yurt Co | 16', 20', 24', 27', 30' | 75 psf | 75 psf | $11,000 | $5,000 |
| LILiving Intent Yurt Co | 12', 14', 16', 20' | — | — | $6,000 |
| NSNomad Shelter | 12', 16', 20', 24', 30', 34', 40', 50' | 60 psf | 60 psf | $15,500 | $8,000 |
| RORainier Outdoor | 16', 18', 21', 24', 27', 30', 33' | 100 psf | 105 psf† | Eagle: $18,820, Raven: $13,358 | Eagle: $9,466, Raven $7,426 |
| SDShelter Designs | 12', 16', 20', 24', 27', 30', 35', 40' | 40 psf | 150 psf | $12,480 | $6,760 |
| YAYurts of America | 12', 14', 16', 20', 30' | 60 psf | 95 psf | $12,000 | $6,499 |
*(30' yurt without upgrades | 30' yurt with all upgrades), †Site specific engineering available for higher snow loads
Rafter Details
| Company | Wood Species | Base Rafter Size for 30' |
|---|---|---|
| BRBlue Ridge Yurts | Spruce | 2x6 |
| CYColorado Yurt | Doug Fir | 2x4 |
| GLGreat Lakes Yurt Co | Doug Fir | 2x6 |
| LILiving Intent Yurt Co | Doug Fir | — |
| NSNomad Shelter | Spruce | 2x6 |
| RORainier Outdoor | Doug Fir | 2x6 |
| SDShelter Designs | Western Tamarack (Larch) | 2x6 |
| YAYurts of America | Southern Yellow Pine | 2x6 |
Lattice Details
| Company | Wood Species | Lattice Thickness | Base Height of Wall |
|---|---|---|---|
| BRBlue Ridge Yurts | Poplar | 3/4" | 7' 4" |
| CYColorado Yurt | Doug Fir | 1/2" | 7' 2" |
| GLGreat Lakes Yurt Co | Doug Fir | 1/2" | 7' 4" |
| LILiving Intent Yurt Co | Bamboo | 1/2" | 6' 9" |
| NSNomad Shelter | Spruce | 7/8" | 7' |
| RORainier Outdoor | Doug Fir | 3/4" | 7' 4" |
| SDShelter Designs | Doug Fir | 7/16" | 7' 2" |
| YAYurts of America | Poplar | 3/4" | 7' |
Available Upgrades
| Company | Insulation |
Thick Roof Cover |
French Doors |
SIP Panels |
Glass Windows |
Awnings |
Rain Diverter |
Opening Dome |
Tinted Dome |
Water Catchment |
Wind & Snow Package |
10ft Walls |
Swappable Walls |
|---|---|---|---|---|---|---|---|---|---|---|---|---|---|
| BRBlue Ridge Yurts | — | — | — | ||||||||||
| CYColorado Yurt | — | — | — | ||||||||||
| GLGreat Lakes Yurt Co | — | — | — | — | — | — | — | — | — | — | |||
| LILiving Intent Yurt Co | — | — | — | — | — | — | — | — | |||||
| NSNomad Shelter | — | — | — | — | — | — | — | — | — | — | — | ||
| RORainier Outdoor | — | ||||||||||||
| SDShelter Designs | — | — | |||||||||||
| YAYurts of America | — | — |
Final Details
| Company | Lead Time | Shipping Available | Financing Available | On-site Construction Services | International Purchasing |
|---|---|---|---|---|---|
| BRBlue Ridge Yurts | 3-4 weeks | — | — | ||
| CYColorado Yurt | 5-8 weeks | ||||
| GLGreat Lakes Yurt Co | 6-8 weeks | — | — | ||
| LILiving Intent Yurt Co | 7 weeks | — | |||
| NSNomad Shelter | 6-12 weeks | ||||
| RORainier Outdoor | 3-7 weeks | ||||
| SDShelter Designs | 4-6 weeks | — | |||
| YAYurts of America | 2-5 weeks |
Ah, electricity… The modern-day spice of life. Every modern home needs it.
A note about electrical work
Electrical can be one of the most intimidating aspects of a build. And for good reason! If done incorrectly, it can cause serious injury, damage or death. Since I’ve never done electrical work, I’m not going to pretend like I do and start teaching others how it’s done. For most of our electrical work, I hired an electrician with experience wiring up tiny houses over at Tiny Innovations. Luckily, he didn’t mind me following along and asking him every question I could think of. Most of the prep work is actually not dangerous and can be done with limited experience. If you’ve never done any electrical work before, consult with a professional.
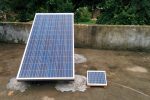
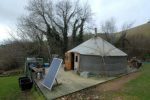
There are presumably two options when it comes to how to access electricity for a yurt. The first option is to tap into existing electrical or power from the city’s grid. The second option is to use solar power. Our budget this time around didn’t allow for the use of solar and we had access to existing power from an RV hookup that we could tap into. Easy enough!
Run conduit from source
The location of the power is located approximately 100ft away directly through a patch of blackberry bushes. Those bushes were partially cleared with a chainsaw. Any permanent electrical lines will need to be run underground through the conduit. That conduit sits in a trench that is later backfilled. Our particular building code wanted the conduit to be 18” below the surface and another 6” if water would be laid in the same trench. This was a job for a gas-powered trencher. Once dug we could lay schedule 40 conduit in, using PVC glue to create a waterproof bond between each section of PVC. Elbows were installed on each end with conduit running vertical attaching to the RV power box on one end and up through the platform into a wall in the yurt.
Mount subpanel
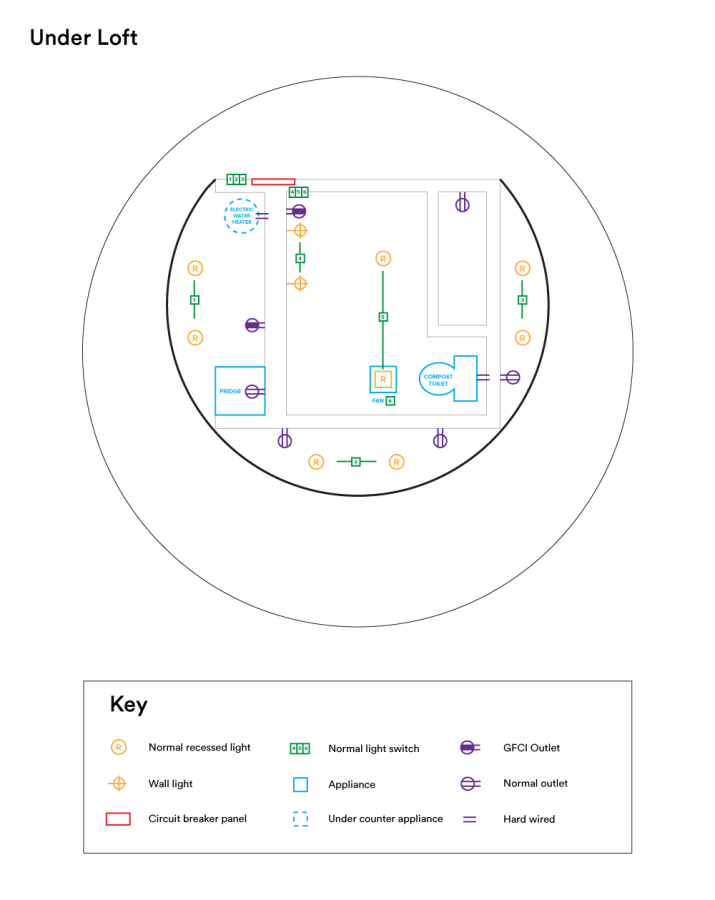
Inside the yurt, you’ll install a subpanel box in between two studs of your wall. Make sure you buy one with enough slots for the breakers you’ll need. Since we will only be using 30 amps, we only need three breakers. 15 amp circuit for the water heater, 15 amp circuit for the lights and 20 amp circuit for the outlets, all 120 volt.
Run wiring with conduit snake
An electrician will be able to do the math to determine what gauge wire you’ll need for your situation. The gauge is determined by the length of the run and how much power you are wanted to draw at the endpoint. For our 30 amps at the end of 100ft conduit, we required #8 wire. The next step would be to run a conduit snake through. A DIY version of this is a string tied to a paper clip. Put a shop vac on one end of the conduit to suck the string all the way through. Tied one end of the string to our wire and pulled it all the way through. Worked like a charm.
The last step is to take these wires and connect the hot, ground and neutral to the appropriate bus bars in your subpanel.
Install outlet and switch boxes
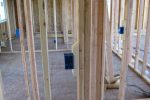
Those blue plastic boxes you see in walls? Those are for outlets and switches. Super simple to install. Measure at what height you want your various electrical fixtures and nail the boxes to the appropriate stud. Try to keep outlets at similar heights. Same for light switches.
Run Romex cable
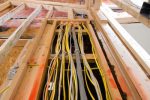
Romex cable is actually just a sleeve that houses multiple wires inside. For a simple job, you’ll have your hot, neutral and ground wire. This cable will start from a breaker (which is connected to the appropriate bus bar in your subpanel) and will go to each appropriate electrical fixture. You’ll be able to daisy chain one off of the other until they are all connected.
Install outlets, switches, and light housings
Modern outlets and switches are very simple to install on your own now. You’ll attach each wire from your Romex to the appropriate spot on the outlet or switch. Most of the time they are different colored screws that the individual instructions describe. Your switches and dimmers will be connected to the relevant light housings in your ceilings or walls.
Flip the switch
If everything was installed correctly, you start flipping on your breakers. Start with the source breaker and progressively turn on the breakers in your subpanel, testing in between. Do not turn on the breaker for your water heater if it is not filled with water. That’s it! Turn a light on. Charge your phone. Plug in your novelty singing big mouth bass.
Previous Chapter

Loft and Room
Next Chapter

