Framing
Difficulty
Time Spent
1 Day
Main specs for American yurt companies (organized alphabetically). Updated December 2019. Pacific Yurts declined to provide information for this website.
Yurt Company Acronym Key
- BR = Blue Ridge Yurts
- CY = Colorado Yurt
- GL = Great Lakes Yurt Co
- LI = Living Intent Yurt Co
- NS = Nomad Shelter
- RO = Rainier Outdoor
- SD = Shelter Designs
- YA = Yurts of America
Company Contact
| Company | Website | Phone Number | |
|---|---|---|---|
| BRBlue Ridge Yurts | blueridgeyurts.com | [email protected] | (540) 745-7458 |
| CYColorado Yurt | coloradoyurt.com | [email protected] | (800) 288-3190 |
| GLGreat Lakes Yurt Co | greatlakesyurtco.com | [email protected] | (269) 808-3664 |
| LILiving Intent Yurt Co | livingintentyurts.com | [email protected] | (207) 350-9457 |
| NSNomad Shelter | nomadshelter.com | [email protected] | (907) 235-0132 |
| RORainier Outdoor | rainieroutdoor.com | [email protected] | (866) 483-6795 |
| SDShelter Designs | shelterdesigns.net | [email protected] | (406) 721-9878 |
| YAYurts of America | yurtsofamerica.com | [email protected] | (317) 377-9878 |
Company Details
| Company | Location | Year First Yurt Sold | Tour Available? |
|---|---|---|---|
| BRBlue Ridge Yurts | Floyd, VA | 2004 | |
| CYColorado Yurt | Montrose, CO | 1980 | |
| GLGreat Lakes Yurt Co | Grass Lake, MI | 2017 | — |
| LILiving Intent Yurt Co | Grass Valley, CA | 2015 | |
| NSNomad Shelter | Homer, AK | 1987 | |
| RORainier Outdoor | Tukwila, WA | 2004 | |
| SDShelter Designs | Missoula, MT | 2005 | |
| YAYurts of America | Indianapolis, IN | 1986 | — |
Yurt Info
| Company | Available Sizes | Max Snow Load* | Base Cost of 30' | Base Cost of 16' |
|---|---|---|---|---|
| BRBlue Ridge Yurts | 16', 20', 24', 30' | 60 psf | 60 psf | $13,047 | $7,299 |
| CYColorado Yurt | 16', 20', 24', 27', 30' | 15 psf | 95 psf† | $12,240 | $7,090 |
| GLGreat Lakes Yurt Co | 16', 20', 24', 27', 30' | 75 psf | 75 psf | $11,000 | $5,000 |
| LILiving Intent Yurt Co | 12', 14', 16', 20' | — | — | $6,000 |
| NSNomad Shelter | 12', 16', 20', 24', 30', 34', 40', 50' | 60 psf | 60 psf | $15,500 | $8,000 |
| RORainier Outdoor | 16', 18', 21', 24', 27', 30', 33' | 100 psf | 105 psf† | Eagle: $18,820, Raven: $13,358 | Eagle: $9,466, Raven $7,426 |
| SDShelter Designs | 12', 16', 20', 24', 27', 30', 35', 40' | 40 psf | 150 psf | $12,480 | $6,760 |
| YAYurts of America | 12', 14', 16', 20', 30' | 60 psf | 95 psf | $12,000 | $6,499 |
*(30' yurt without upgrades | 30' yurt with all upgrades), †Site specific engineering available for higher snow loads
Rafter Details
| Company | Wood Species | Base Rafter Size for 30' |
|---|---|---|
| BRBlue Ridge Yurts | Spruce | 2x6 |
| CYColorado Yurt | Doug Fir | 2x4 |
| GLGreat Lakes Yurt Co | Doug Fir | 2x6 |
| LILiving Intent Yurt Co | Doug Fir | — |
| NSNomad Shelter | Spruce | 2x6 |
| RORainier Outdoor | Doug Fir | 2x6 |
| SDShelter Designs | Western Tamarack (Larch) | 2x6 |
| YAYurts of America | Southern Yellow Pine | 2x6 |
Lattice Details
| Company | Wood Species | Lattice Thickness | Base Height of Wall |
|---|---|---|---|
| BRBlue Ridge Yurts | Poplar | 3/4" | 7' 4" |
| CYColorado Yurt | Doug Fir | 1/2" | 7' 2" |
| GLGreat Lakes Yurt Co | Doug Fir | 1/2" | 7' 4" |
| LILiving Intent Yurt Co | Bamboo | 1/2" | 6' 9" |
| NSNomad Shelter | Spruce | 7/8" | 7' |
| RORainier Outdoor | Doug Fir | 3/4" | 7' 4" |
| SDShelter Designs | Doug Fir | 7/16" | 7' 2" |
| YAYurts of America | Poplar | 3/4" | 7' |
Available Upgrades
| Company | Insulation |
Thick Roof Cover |
French Doors |
SIP Panels |
Glass Windows |
Awnings |
Rain Diverter |
Opening Dome |
Tinted Dome |
Water Catchment |
Wind & Snow Package |
10ft Walls |
Swappable Walls |
|---|---|---|---|---|---|---|---|---|---|---|---|---|---|
| BRBlue Ridge Yurts | — | — | — | ||||||||||
| CYColorado Yurt | — | — | — | ||||||||||
| GLGreat Lakes Yurt Co | — | — | — | — | — | — | — | — | — | — | |||
| LILiving Intent Yurt Co | — | — | — | — | — | — | — | — | |||||
| NSNomad Shelter | — | — | — | — | — | — | — | — | — | — | — | ||
| RORainier Outdoor | — | ||||||||||||
| SDShelter Designs | — | — | |||||||||||
| YAYurts of America | — | — |
Final Details
| Company | Lead Time | Shipping Available | Financing Available | On-site Construction Services | International Purchasing |
|---|---|---|---|---|---|
| BRBlue Ridge Yurts | 3-4 weeks | — | — | ||
| CYColorado Yurt | 5-8 weeks | ||||
| GLGreat Lakes Yurt Co | 6-8 weeks | — | — | ||
| LILiving Intent Yurt Co | 7 weeks | — | |||
| NSNomad Shelter | 6-12 weeks | ||||
| RORainier Outdoor | 3-7 weeks | ||||
| SDShelter Designs | 4-6 weeks | — | |||
| YAYurts of America | 2-5 weeks |
This is when the yurt takes shape. It requires true collaboration and coordination.
Materials check
Before you begin, open up your crates and check to ensure you have all your materials. With the number of different pieces, there’s a possibility that something may have been misplaced during packing or transit. You’ll want to know that well in advance of your build so you can receive a replacement if necessary.
Attach story strip
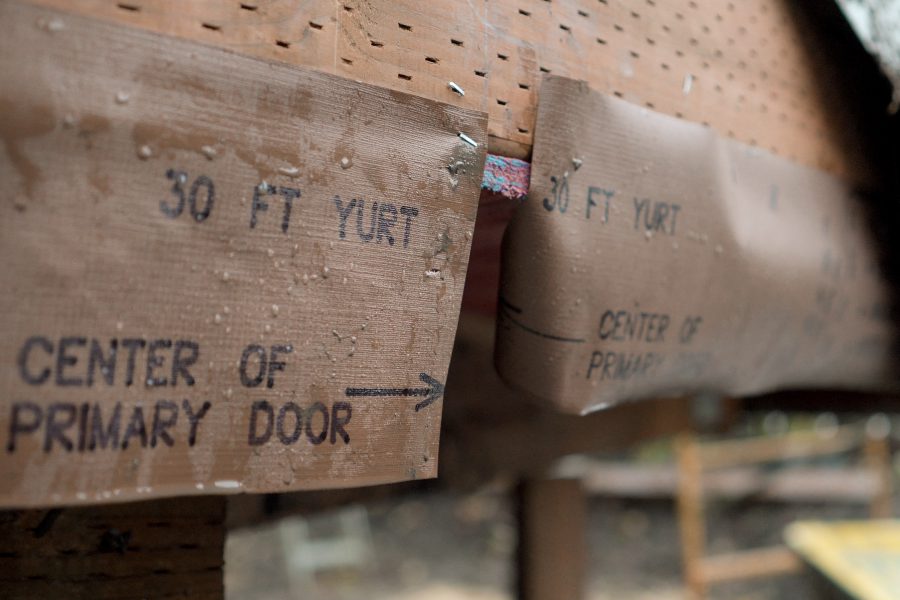
The story strip is your North Star. It’ll show you exactly where your doors should be installed and will allow you to double-check your lattice placement. You’ll also use it in later steps when attaching wall panels. Secure it to the perimeter of your platform with staples. This is exclusive to Rainier Outdoor.
Secure doors
Most yurts will only have a door but some may have several. For each door, you’ll attach a thin piece of vinyl called a threshold cover underneath the door that drapes over the platform. This will prevent water from entering into the platform. Use your story strip for proper door placement and ensure the doors are plumb by using a level. Secure doors to the platform with the nuts and long bolts provided.
Assemble lattice sections
Because of their size, most lattice is not able to be shipped in one large piece. They’ll come in sections that will need to be attached together with a mixture of rivets and bolts. You’ll attach metal strap ties to the bottom of the lattice which will secure the lattice to the platform below.
Stretch lattice and secure
Finally! Something goes vertical. Move your collapsed lattice to the center of the desired wall location. Lift up and have people slowly stretch the lattice on both sides along the perimeter of the platform ensuring it doesn’t fall off. Once the lattice reaches the door(s), slip the door tang into the end pieces of lattice. Bolts and nuts will hold the ends in place. Make minor adjustments to the lattice placement with the help of the story strip. Secure screws through the strap ties and into the platform.
Place tension cable
Place tension cable into the tops of the lattice starting clockwise from the right side of your primary door. Try to have as little sag as possible as you place it in. Ensure the lock pin on the cable is secure.
Construct scaffolding
In order to install the roof, you will need some height. Because of the weight of the ring and the number of people required, ladders won’t cut it. You’ll need scaffolding with enough surface area for the required amount of people. The size of the scaffolding needed will depend on the size yurt being constructed.
Prep rafters, ring, and lattice
Your rafters will most likely have hardware that will need to be attached that will adjoin the rafters to the ring. Over at the lattice, place a piece of painters tape on every other gap of lattice and the slots on the doors. These are where your rafters will be placed. Number each one sequentially. For a 30 foot Rainier yurt, you will have 50 rafters with 50 pieces of blue tape. A smaller yurt will have less.
Unpack your ring and number each of the rafter holes coordinated them with the numbered gaps in the lattice. If you have a dome that will open pay special attention to how your ring is oriented. You don’t want your dome to open into the direction of the prevailing wind as you risk having your dome being ripped off.
Bring up ring
With a rope tied to the ring, pull the ring onto the scaffolding. Orient it so that the numbers on the ring line up with the numbers on the lattice.
Secure first four rafters
The first ones are always the hardest. Ideally, you’ll have two to three people up on the scaffolding holding the ring as someone down below hands one end of the rafter up to the ring. You will start with the slot on the primary door. Someone on the scaffolding will insert the rafter’s pin into the corresponding hole in the ring. The person down below will slip the bottom of the rafter into the tension cable slot and secure it in place by tightening the set screw. Repeat on the opposite side of the primary door and twice more at a 90-degree angle from the first two rafters.
If your yurt is a compass, you should now have a rafter on the North, South, East and West section of the yurt. At this point—if done properly—your ring should be self-supported and you can let go.
Install remaining rafters in an opposite pattern
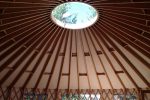
Now it’s time to install the rest of the rafters. Start with any rafters that are over door frames. Insert rafter pin into compression ring. Slip rafter end notch onto cable and tighten screw. Use the 3/16th drill bit to pre-drill three inches in the ring where the rafter-to-ring hardware will be secured. Attach rafter brackets to ring with the provided screw.
Caution!
Tighten each set screw AND compression ring screws for each rafter before proceeding to the next.
Secure any additional support between rafters
If your yurt requires a higher snow load or wind resistance, additional materials will need to be installed. There are blocks that can be installed within in between rafters. These will be installed perpendicular to the floor with the help of a level or jig. There are also perimeter posts that can be installed next to the lattice walls that provide vertical support for the rafters. In extreme cases, a center column can be installed into the ground, through the platform and attaching to the ring to provide additional vertical support.
Previous Chapter

Platform
Next Chapter


