Roof and Walls
Difficulty


Time Spent
1 Day

Main specs for American yurt companies (organized alphabetically). Updated December 2019. Pacific Yurts declined to provide information for this website.
Yurt Company Acronym Key
- BR = Blue Ridge Yurts
- CY = Colorado Yurt
- GL = Great Lakes Yurt Co
- LI = Living Intent Yurt Co
- NS = Nomad Shelter
- RO = Rainier Outdoor
- SD = Shelter Designs
- YA = Yurts of America
Company Contact
| Company | Website | Phone Number | |
|---|---|---|---|
| BRBlue Ridge Yurts | blueridgeyurts.com | [email protected] | (540) 745-7458 |
| CYColorado Yurt | coloradoyurt.com | [email protected] | (800) 288-3190 |
| GLGreat Lakes Yurt Co | greatlakesyurtco.com | [email protected] | (269) 808-3664 |
| LILiving Intent Yurt Co | livingintentyurts.com | [email protected] | (207) 350-9457 |
| NSNomad Shelter | nomadshelter.com | [email protected] | (907) 235-0132 |
| RORainier Outdoor | rainieroutdoor.com | [email protected] | (866) 483-6795 |
| SDShelter Designs | shelterdesigns.net | [email protected] | (406) 721-9878 |
| YAYurts of America | yurtsofamerica.com | [email protected] | (317) 377-9878 |
Company Details
| Company | Location | Year First Yurt Sold | Tour Available? |
|---|---|---|---|
| BRBlue Ridge Yurts | Floyd, VA | 2004 | |
| CYColorado Yurt | Montrose, CO | 1980 | |
| GLGreat Lakes Yurt Co | Grass Lake, MI | 2017 | — |
| LILiving Intent Yurt Co | Grass Valley, CA | 2015 | |
| NSNomad Shelter | Homer, AK | 1987 | |
| RORainier Outdoor | Tukwila, WA | 2004 | |
| SDShelter Designs | Missoula, MT | 2005 | |
| YAYurts of America | Indianapolis, IN | 1986 | — |
Yurt Info
| Company | Available Sizes | Max Snow Load* | Base Cost of 30' | Base Cost of 16' |
|---|---|---|---|---|
| BRBlue Ridge Yurts | 16', 20', 24', 30' | 60 psf | 60 psf | $13,047 | $7,299 |
| CYColorado Yurt | 16', 20', 24', 27', 30' | 15 psf | 95 psf† | $12,240 | $7,090 |
| GLGreat Lakes Yurt Co | 16', 20', 24', 27', 30' | 75 psf | 75 psf | $11,000 | $5,000 |
| LILiving Intent Yurt Co | 12', 14', 16', 20' | — | — | $6,000 |
| NSNomad Shelter | 12', 16', 20', 24', 30', 34', 40', 50' | 60 psf | 60 psf | $15,500 | $8,000 |
| RORainier Outdoor | 16', 18', 21', 24', 27', 30', 33' | 100 psf | 105 psf† | Eagle: $18,820, Raven: $13,358 | Eagle: $9,466, Raven $7,426 |
| SDShelter Designs | 12', 16', 20', 24', 27', 30', 35', 40' | 40 psf | 150 psf | $12,480 | $6,760 |
| YAYurts of America | 12', 14', 16', 20', 30' | 60 psf | 95 psf | $12,000 | $6,499 |
*(30' yurt without upgrades | 30' yurt with all upgrades), †Site specific engineering available for higher snow loads
Rafter Details
| Company | Wood Species | Base Rafter Size for 30' |
|---|---|---|
| BRBlue Ridge Yurts | Spruce | 2x6 |
| CYColorado Yurt | Doug Fir | 2x4 |
| GLGreat Lakes Yurt Co | Doug Fir | 2x6 |
| LILiving Intent Yurt Co | Doug Fir | — |
| NSNomad Shelter | Spruce | 2x6 |
| RORainier Outdoor | Doug Fir | 2x6 |
| SDShelter Designs | Western Tamarack (Larch) | 2x6 |
| YAYurts of America | Southern Yellow Pine | 2x6 |
Lattice Details
| Company | Wood Species | Lattice Thickness | Base Height of Wall |
|---|---|---|---|
| BRBlue Ridge Yurts | Poplar | 3/4" | 7' 4" |
| CYColorado Yurt | Doug Fir | 1/2" | 7' 2" |
| GLGreat Lakes Yurt Co | Doug Fir | 1/2" | 7' 4" |
| LILiving Intent Yurt Co | Bamboo | 1/2" | 6' 9" |
| NSNomad Shelter | Spruce | 7/8" | 7' |
| RORainier Outdoor | Doug Fir | 3/4" | 7' 4" |
| SDShelter Designs | Doug Fir | 7/16" | 7' 2" |
| YAYurts of America | Poplar | 3/4" | 7' |
Available Upgrades
| Company | Insulation |
Thick Roof Cover |
French Doors |
SIP Panels |
Glass Windows |
Awnings |
Rain Diverter |
Opening Dome |
Tinted Dome |
Water Catchment |
Wind & Snow Package |
10ft Walls |
Swappable Walls |
|---|---|---|---|---|---|---|---|---|---|---|---|---|---|
| BRBlue Ridge Yurts | — | — | — | ||||||||||
| CYColorado Yurt | — | — | — | ||||||||||
| GLGreat Lakes Yurt Co | — | — | — | — | — | — | — | — | — | — | |||
| LILiving Intent Yurt Co | — | — | — | — | — | — | — | — | |||||
| NSNomad Shelter | — | — | — | — | — | — | — | — | — | — | — | ||
| RORainier Outdoor | — | ||||||||||||
| SDShelter Designs | — | — | |||||||||||
| YAYurts of America | — | — |
Final Details
| Company | Lead Time | Shipping Available | Financing Available | On-site Construction Services | International Purchasing |
|---|---|---|---|---|---|
| BRBlue Ridge Yurts | 3-4 weeks | — | — | ||
| CYColorado Yurt | 5-8 weeks | ||||
| GLGreat Lakes Yurt Co | 6-8 weeks | — | — | ||
| LILiving Intent Yurt Co | 7 weeks | — | |||
| NSNomad Shelter | 6-12 weeks | ||||
| RORainier Outdoor | 3-7 weeks | ||||
| SDShelter Designs | 4-6 weeks | — | |||
| YAYurts of America | 2-5 weeks |
With the bones of your yurt complete, it’s time to add the final finish that will protect your yurt from the elements.
Install roof liner
Carry rolled-up liner through the center ring to the top of the roof. Roll the liner down holding onto the top. Unfold the liner until it covers half of the yurt. Pull the remaining fabric over the top of the roof to cover the remaining half. All seams should be facing up at this point. Adjust the liner to fit equally snug around the entire roof. The liner should be smooth. Secure liner in place by stapling the bottom of the liner to the rafters and the top to the ring. Use only stainless steel staples.


One More Thing
This liner does get dirty easily. It is best if placed into a large garbage bag until it is up on the roof ready to be rolled down.
Install roof insulation
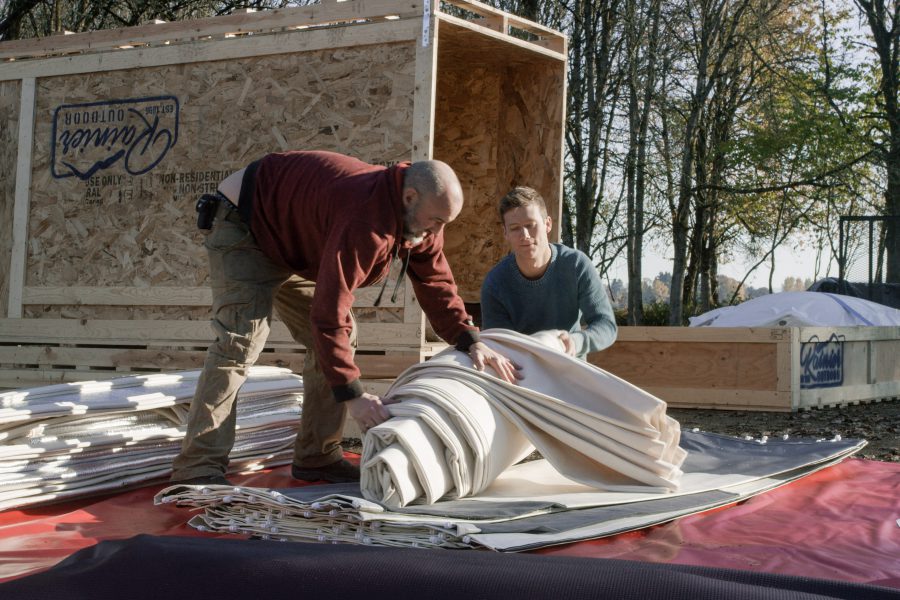
If you opted to have roof insulation, this will be installed as separate layers. The insulation will come in separate sections that will be adjoined at the seams with foil tape on both sides. Best if done on a large flat surface. Once taped, fold in half, accordion-style. Bring the insulation to the roof and splay out across the entire roof. After ensuring the insulation is centered, secure in place with more staples. Repeat if you have double insulation.


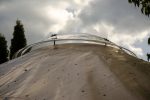
Install top vinyl cover
The beast! These vinyl roof covers are heavy—especially if you choose to go for the thicker option. After folding and rolling cover into a nice, big bundle, you’ll lift to the roof via the scaffolding inside. Because of its weight, this may require 3-4 people. Unroll the fabric towards the primary door so that the red tag is centered within the door. Unfold until half of the roof is covered. Tie a rope through the cable of the cover. From the ring, pull the top half up and over to cover the other half of the roof. Adjust roof cover to be an equal height above the platform all the way around. Double-check that the red tag is centered within the primary door—this is important!


Lift and secure dome on top
Tie ropes to one side of the dome and hoist to the top. Careful not to snag your roof. The dome is fragile so handle with care. Attach with springs to the eyelets in the ring. If your dome is able to be opened you’ll need to attach the appropriate hardware to the ring’s spindle jack.


Hang interior wall and insulation panels
There is a cable embedded into the bottom of your roof cover. This is what you will hang your walls from. Using your manual as a guide, hang each section of insulation with the velcro at the top. The foil insulation should be facing outwards. Your story strip will tell you where each panel should stop and start. There should be a 4” overlap between insulation pieces.


Hang exterior vinyl panels
Once the insulation is hung, it’s time to move onto the exterior wall panels. Jib-hanks at the top of the panels will click into the roof cable. Again, your story strip will be helpful here. Once in place, zip each panel to the next one and fold the velcro over the zipper.


Attach walls to bottom cable
Snap cable into the wall’s bottom jib hanks starting clockwise from the primary door. Tie ends of the rope into a hitch-knot and pull the cable tight.
Install door frame
Remove the door frame from the outer frame. For a french door, you’ll pull the adjacent wall panels in and staple to the insides. For a normal door, hang a solid wall panel over the door and cut an X from corner to corner. Wrap the remaining wall panel in and staple. Insert the door frame back into the outer frame and shim to fit. This will be a similar process if you have any solid windows.


Cinch ropes
Like tightening the belt on a new pair of jeans, this is the final step before showing everything off to the world. Pull the roof cord tight and cinch into the roof cleat. Attach cleats to the platform according to your story strip. Tie the provided ropes from the grommets in the roof to the cleats with a hitch-knot. Repeat for each cleat location.
You have a yurt!
Congrats! You’ve got a roof over your head! Pop the champagne and enjoy. If you plan on keeping the interior of your yurt minimal, you could move in today. If you plan on outfitting your yurt with all the bells and whistles then your work has only just begun. Continue on!
Previous Chapter
Framing
Next Chapter