Platform
Difficulty
Time Spent
12 Days
Approx Cost
$4000 - $10000
Main specs for American yurt companies (organized alphabetically). Updated December 2019. Pacific Yurts declined to provide information for this website.
Yurt Company Acronym Key
- BR = Blue Ridge Yurts
- CY = Colorado Yurt
- GL = Great Lakes Yurt Co
- LI = Living Intent Yurt Co
- NS = Nomad Shelter
- RO = Rainier Outdoor
- SD = Shelter Designs
- YA = Yurts of America
Company Contact
Company | Website | Phone Number | |
---|---|---|---|
BRBlue Ridge Yurts | blueridgeyurts.com | info@blueridgeyurts.com | (540) 745-7458 |
CYColorado Yurt | coloradoyurt.com | info@coloradoyurt.com | (800) 288-3190 |
GLGreat Lakes Yurt Co | greatlakesyurtco.com | steve@greatlakesyurtco.com | (269) 808-3664 |
LILiving Intent Yurt Co | livingintentyurts.com | livingintentyurts@gmail.com | (207) 350-9457 |
NSNomad Shelter | nomadshelter.com | nomadsheltersales@gmail.com | (907) 235-0132 |
RORainier Outdoor | rainieroutdoor.com | outdoor@rainier.com | (866) 483-6795 |
SDShelter Designs | shelterdesigns.net | info@shelterdesigns.net | (406) 721-9878 |
YAYurts of America | yurtsofamerica.com | info@yurtsofamerica.com | (317) 377-9878 |
Company Details
Company | Location | Year First Yurt Sold | Tour Available? |
---|---|---|---|
BRBlue Ridge Yurts | Floyd, VA | 2004 | |
CYColorado Yurt | Montrose, CO | 1980 | |
GLGreat Lakes Yurt Co | Grass Lake, MI | 2017 | — |
LILiving Intent Yurt Co | Grass Valley, CA | 2015 | |
NSNomad Shelter | Homer, AK | 1987 | |
RORainier Outdoor | Tukwila, WA | 2004 | |
SDShelter Designs | Missoula, MT | 2005 | |
YAYurts of America | Indianapolis, IN | 1986 | — |
Yurt Info
Company | Available Sizes | Max Snow Load* | Base Cost of 30' | Base Cost of 16' |
---|---|---|---|---|
BRBlue Ridge Yurts | 16', 20', 24', 30' | 60 psf | 60 psf | $13,047 | $7,299 |
CYColorado Yurt | 16', 20', 24', 27', 30' | 15 psf | 95 psf† | $12,240 | $7,090 |
GLGreat Lakes Yurt Co | 16', 20', 24', 27', 30' | 75 psf | 75 psf | $11,000 | $5,000 |
LILiving Intent Yurt Co | 12', 14', 16', 20' | — | — | $6,000 |
NSNomad Shelter | 12', 16', 20', 24', 30', 34', 40', 50' | 60 psf | 60 psf | $15,500 | $8,000 |
RORainier Outdoor | 16', 18', 21', 24', 27', 30', 33' | 100 psf | 105 psf† | Eagle: $18,820, Raven: $13,358 | Eagle: $9,466, Raven $7,426 |
SDShelter Designs | 12', 16', 20', 24', 27', 30', 35', 40' | 40 psf | 150 psf | $12,480 | $6,760 |
YAYurts of America | 12', 14', 16', 20', 30' | 60 psf | 95 psf | $12,000 | $6,499 |
*(30' yurt without upgrades | 30' yurt with all upgrades), †Site specific engineering available for higher snow loads
Rafter Details
Company | Wood Species | Base Rafter Size for 30' |
---|---|---|
BRBlue Ridge Yurts | Spruce | 2x6 |
CYColorado Yurt | Doug Fir | 2x4 |
GLGreat Lakes Yurt Co | Doug Fir | 2x6 |
LILiving Intent Yurt Co | Doug Fir | — |
NSNomad Shelter | Spruce | 2x6 |
RORainier Outdoor | Doug Fir | 2x6 |
SDShelter Designs | Western Tamarack (Larch) | 2x6 |
YAYurts of America | Southern Yellow Pine | 2x6 |
Lattice Details
Company | Wood Species | Lattice Thickness | Base Height of Wall |
---|---|---|---|
BRBlue Ridge Yurts | Poplar | 3/4" | 7' 4" |
CYColorado Yurt | Doug Fir | 1/2" | 7' 2" |
GLGreat Lakes Yurt Co | Doug Fir | 1/2" | 7' 4" |
LILiving Intent Yurt Co | Bamboo | 1/2" | 6' 9" |
NSNomad Shelter | Spruce | 7/8" | 7' |
RORainier Outdoor | Doug Fir | 3/4" | 7' 4" |
SDShelter Designs | Doug Fir | 7/16" | 7' 2" |
YAYurts of America | Poplar | 3/4" | 7' |
Available Upgrades
Company | Insulation |
Thick Roof Cover |
French Doors |
SIP Panels |
Glass Windows |
Awnings |
Rain Diverter |
Opening Dome |
Tinted Dome |
Water Catchment |
Wind & Snow Package |
10ft Walls |
Swappable Walls |
---|---|---|---|---|---|---|---|---|---|---|---|---|---|
BRBlue Ridge Yurts | — | — | — | ||||||||||
CYColorado Yurt | — | — | — | ||||||||||
GLGreat Lakes Yurt Co | — | — | — | — | — | — | — | — | — | — | |||
LILiving Intent Yurt Co | — | — | — | — | — | — | — | — | |||||
NSNomad Shelter | — | — | — | — | — | — | — | — | — | — | — | ||
RORainier Outdoor | — | ||||||||||||
SDShelter Designs | — | — | |||||||||||
YAYurts of America | — | — |
Final Details
Company | Lead Time | Shipping Available | Financing Available | On-site Construction Services | International Purchasing |
---|---|---|---|---|---|
BRBlue Ridge Yurts | 3-4 weeks | — | — | ||
CYColorado Yurt | 5-8 weeks | ||||
GLGreat Lakes Yurt Co | 6-8 weeks | — | — | ||
LILiving Intent Yurt Co | 7 weeks | — | |||
NSNomad Shelter | 6-12 weeks | ||||
RORainier Outdoor | 3-7 weeks | ||||
SDShelter Designs | 4-6 weeks | — | |||
YAYurts of America | 2-5 weeks |
A more permanent yurt will require a more permanent base to sit on. Build one to last.
Mark footing locations
The first step is always the most important. Using your engineering drawings as a reference, you’ll need to find where each footing will be placed using stakes and string lines. SIPs will require fewer footings than a normal joisted deck platform. Extra consideration should be taken to accurate placement. Two people are better than one for this step.
-
Find the center point of the yurt
By securing a string to a stake in the ground and cutting it to the length of your yurt’s radius, you’ll be able to walk around with an accurate representation of what space your yurt will occupy.
-
Create your compass lines
By using the Pythagorean theorem (3-4-5 rule), you’ll be able to find two perpendicular lines that you can then build off. Secure the lines to batter boards that extend past the yurt’s perimeter. These lines need to be as accurate as possible.
-
Place your footing lines
Using your compass lines and our old friend Pythagorean, you’ll be able to secure additional string lines that should line up exactly with adjacent footings.
-
Mark footing locations
After measuring out the exact location of each footing on your string lines, use a plumb bob to find the corresponding point on the ground and drive a stake into its exact location.
Dig footing holes
There are numerous methods for digging holes, each with varying degrees of strain. From digging by hand with a post hole to using an auger or toro dingo-style machine. They should all achieve the same thing: holes that are 18 inches below your site’s frost line and wide enough to fit the minimum required concrete form (reference local building codes). You’ll need to temporarily remove string lines to dig. Do not remove batter boards yet. Our holes were dug 18” wide and 36” deep.
Fill footings with concrete and rebar
Fill your holes with six inches of gravel. Place the concrete form in the hole and align to the string lines you’ve put back. Check that concrete form extends the proper height above the ground (typically 6 inches). Place final additional string lines that are offset half the width of your column bases. Fill concrete forms with high PSI concrete checking for proper consistency. Like Goldilocks’ bed, you don’t want your concrete mix to firm or too soft. Agitate concrete form by tapping and plunging rebar into form to remove air pockets. Place four bars of rebar cut to the proper length into the concrete to reinforce footing.
Place column bases
Submerge your column base into the center of your concrete. Measure its placement again and align with existing string lines. There is no moving it once the concrete sets. Once dry, sequentially number each column base with a sharpie.
One More Thing
Hot-dipped galvanized hardware is recommended. It comes with a heavier price tag but will last for decades. Additionally, local code required I use 4x6 lumber for my posts so I had to purchase the corresponding 4x6 column bases.
Determine your post heights
Your goal is that once cut and secured to your footings, each post will end on the exact same plane as all the others. This is what creates a level platform. The land you are building on will most likely not be perfectly flat thus requiring each of your posts to be a different height. The most accurate way to find these measurements is with a laser level (this can be rented).
-
Set your laser level to an approximate height
This height is arbitrary as we’ll be doing some math later to find the exact height. Ensure the device is level and plumb.
-
Find your reference measurement for each post
Place a piece of lumber into the column base and record the height of the laser that appears on the wood. Repeat for each footing.
-
Measure your “control post”
Determine which post will likely be the shortest of them all. Figure out the desired height of your final post taking into account that your subframe lumber and platform will sit on top. Deduct this measurement from the height of the laser level you recorded on this post. The number you come up with is very important. We’ll call it the “difference number.”
-
Deduct the difference number from each laser level measurement
By subtracting the “difference number” we got from our control post from the measurements we got from the laser level, we are able to deduce the exact measurement for every post.
Cut and secure your posts
Using the measurements we calculated from our laser level, measure out each post and cut to the desired length. Secure to the column bases with the appropriate screws.
Caution!
All the wood used for the platform should be pressure-treated and rated for the outdoors. Non-pressure-treated wood will deteriorate quickly and risks structural failure.
Build rest of subframe
Using your engineering plans, determine the proper size and placement of the beams that will make up your subframe. Attach to your posts using post caps. Purchase the lumber that will become your end beams longer than required and cut down to size after installation. You are only looking for a six-inch gap between the end of your beam and the edge of your platform.
Place and secure SIP panels to the subframe
One by one and starting from the center pieces out, place your SIP panels on the subframe and secure to the beams underneath with lag screws. Ensure the first piece is properly placed as it will be what all other pieces are built off of. You’ll need to create splines that add rigidity to the edges of the SIPs and secure them to each other.
One More Thing
Make your SIP panels weather-resistant by painting them with exterior house paint.
Kerf and install perimeter boards
Using a circular saw, kerf 2×4 boards by cutting equally spaced cuts into the boards leaving ⅜” of wood with each cut. By doing so, the boards will have the ability to bend around the perimeter of the platform. Secure in place with deck screws.
Secure vapor barrier to platform
Staple plastic sheeting to the face of the platform, using Tyvek tape to seal any joints. Trim to the circular shape of the platform.
IMPORTANT: Place and secure final flooring on top of the platform
Here it comes. Despite the warnings, this is the step I failed to do properly and paid the price later on. Because the lattice walls sit on the finished floor of the yurt it is advised that the floor is finished completely before erecting the rest of the yurt. With my hands on 800 sq ft of salvaged flooring from Good Wood, I incorrectly estimated the amount of time it would take to install because of the additional work it takes to prep reclaimed material.
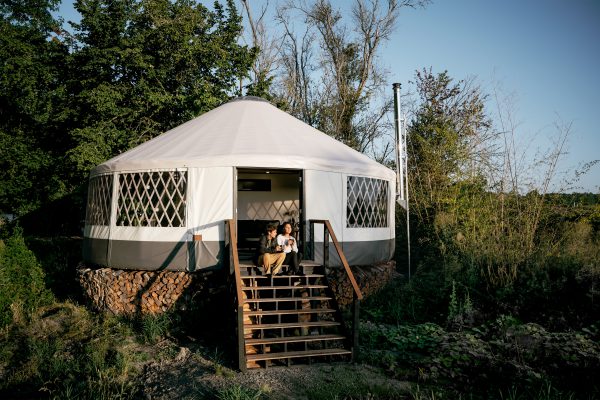

As the scheduled yurt build quickly approached, I resorted to just installing the boards that would make up the perimeter of the yurt’s flooring. My plan was to fill in the rest of the flooring at a later date. While this did work in theory, it also created a compounding collection of headaches when installing the rest of the flooring months later.
So please, learn from my mistakes. Install your flooring now before your yurt goes up. If you’re using salvaged flooring, plan on spending a lot more time installing. Trim the edge of the flooring by using a router and flush trim bit.